Cisco ASA
Cisco ASA provides a variety of useful logging information. To set the correct logging, you can choose the method that works the best for you. You can choose either the GUI using Adaptive Security Device Manager (ASDM) or CLI using SSH.
This procedure demonstrates the ASDM configuration for all available syslog destinations.
-
In order to enable logging on the ASA, first configure the basic logging parameters. Choose
Configuration ‣ Features ‣ Properties ‣ Logging ‣ Logging Setup.Check the Enable logging check box in order to enable syslog.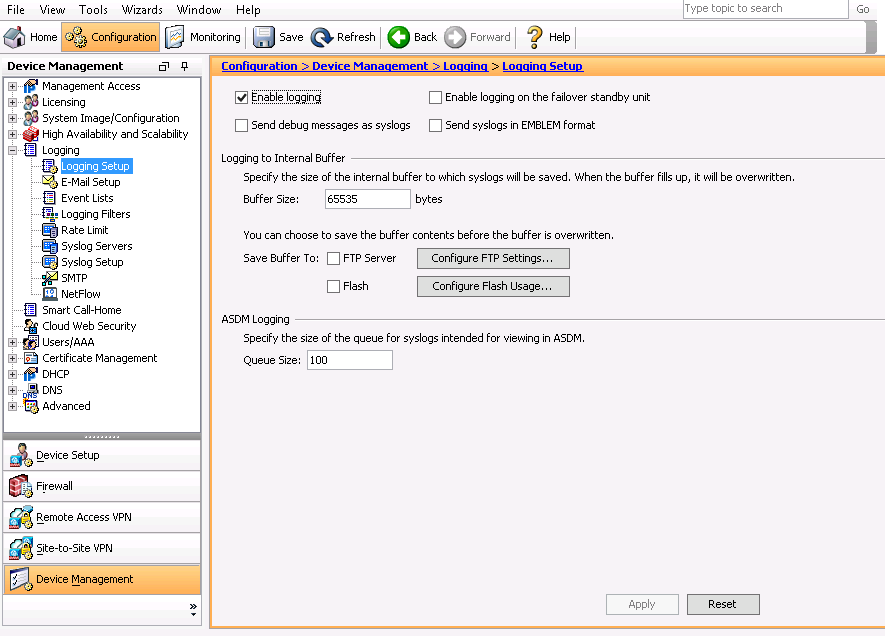
Enable logging
-
In order to configure the Logmanager server as the destination for syslog, choose Syslog Servers in Logging and click Add in order to add the Logmanager server. Enter the Logmanager server details in the Add Syslog Server box:
- select interface
- set Logmanager_ip_address
- set protocol to UDP
- port 514
- enable Log messages in Cisco EMBLEM format (UDP only) and choose OK when you are done.
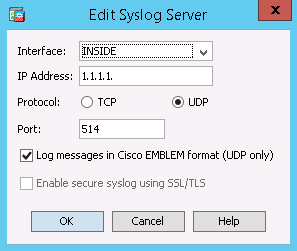
Logging to the Logmanager
-
In order to enable logs to be sent to any of the prior mentioned destinations, choose
Logging Filtersin the logging section. This presents you with each possible logging destination and the current level of logs that are sent to those destinations. Choose the desired Logging Destination and click Edit.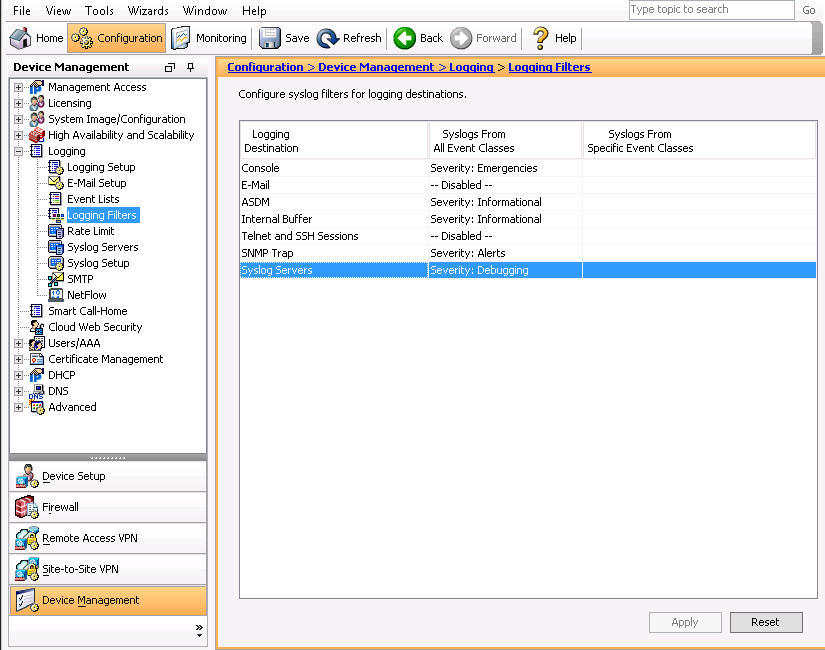
Configure syslog filters
-
Choose an appropriate severity, in this case Debugging, from the Filter on severity drop-down list. Click OK when you are done.
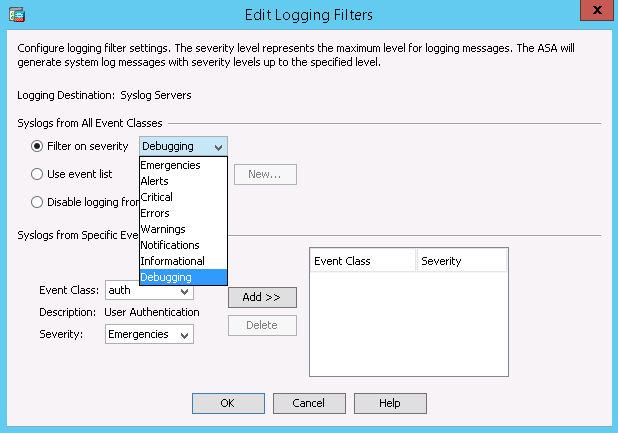
Edit logging filters
-
Click Apply after you return to the Logging Filters window.
Log in to your Cisco ASA device using SSH and use the following commands to configure the format of syslog messages correctly.
-
Login to Cisco ASA device
-
Before any messages are sent to the log buffer, you must enable logging using the logging enable command:
logging enable -
To specify that syslog messages should include the date and time when the messages was generated, use command:
logging timestamp -
To specify the size of the log buffer, use command buffer-size. Set buffer size to 64kB:
logging buffer-size 65535 -
To enable the adaptive security appliance to display syslog messages in console sessions, use command console with emergencies level:
logging console emergencies -
Enable logging to the log buffer:
logging buffered informational -
To specify which syslog messages the adaptive security appliance sends to the Logmanager server, use command:
logging trap debugging -
To enable SNMP logging and specify which messages are to be sent to SNMP servers, use command:
logging history alerts -
Enable logging to ASDM:
logging asdm informational -
To specify the logging facility used for messages sent to the Logmanager server, use facility command with number facility 16:
logging facility 16 -
To specify how many syslog messages the adaptive security appliance may hold in its queue before processing them according to the logging configuration, use command:
logging queue 4096 -
To define the Logmanager server, use the logging host command:
logging host <interface_name> <Logmanager_IP_address> format embleminterface_name specifies the interface on which the Logmanager server resides.Logmanager_IP_address is the IP address of your Logmanager server. -
To specify the logging level of a syslog message, use the logging message command with the level keyword:
logging message 302014 level warnings -
To allow management access to an interface other than the one from which you entered the adaptive security appliance when using VPN, use the management-access command:
management-access <mgmt_if>mgmt_if specifies the name of the management interface you want to access when entering the adaptive security appliance from another interface. -
Enable logging for ACL rule that you need to log:
access-list <ACL_rule> extended permit ip any any log debuggingACL_rule: for example: INSIDE_OUT or inside_access_in… -
Defines object groups that you can use to optimize your configuration:
access-group <ACL_rule> in interface <interface_name>
To enable secure logging on the ASA, you first need to install the syslog servers CA certificate. An easy way of doing this is through ASDM. To begin, log in to ASDM and navigate to Device Management, Certificate Management and then click CA Certificates and press Add.
Name the certificate something descriptive such as “Syslog” and then choose “Paste Certificate in PEM format” and paste the contents of your servers´ PEM certificate into the box and choose “Install Certificate”.
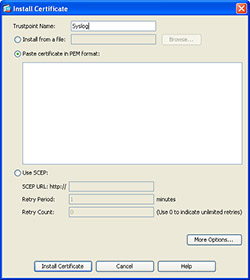
Install Certificate
Next, navigate to Logging, Syslog Servers and choose “Add.” In the pop-up box, designate your inside interface (if that is where your logging server resides), supply the IP address of the server, choose “TCP,” change the port and check the “Enable Secure Syslog Logging”, pressing “Ok” when done.
After pressing “Ok”, make sure to check the box “Allow user traffic to pass when TCP syslog server is down”.
You can now enable syslog logging by going to Logging Filters, double clicking Syslog Servers and choosing a severity to filter on.
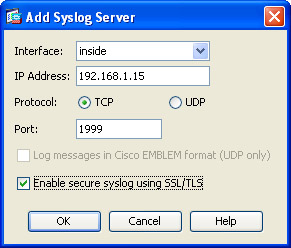
Add Syslog Server