Windows
New versions of Logmanager 3.9.X cannot register newly installed WES agents. The development of the WES agent has been discontinued and replaced by the new Logmanager Beat Agent. Already installed/registered WES agents will continue to work. These are really just new installations of “old” WES agents, they are referred to as “legacy” or “deprecated”. We therefore recommend switching to the new Logmanager Beat Agents.
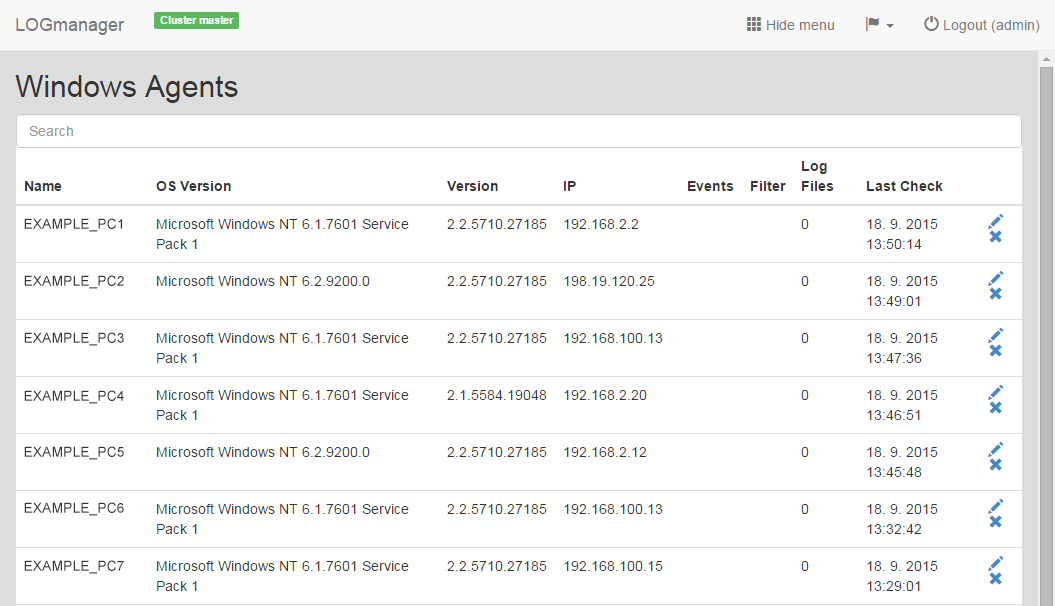
In this subsection you can set up devices which runs on Windows with the installed WES client. Here, the information about all Windows stationsis displayed, which communicate with the Logmanager. Stations in the list are added automatically based on the communication between WES and Logmanager - that’s why it is possible only to edit. If it is required to store other logfile types than from WES (e.g.: service MS Firewall, service MS IIS), it is necessary to create the editing station.
Starting version 3.11, there is an option to automatically migrate your deprecated WES agent to the current version of the new Orchestrator. Go to What to look out for when migrating to the new Agent? to learn how.
The old WES agent (legacy) uses TLS 1.0 for the initial connection to Logmanager, then switches to TLS 1.2. Therefore, registering a new one will fail, but agents already registered will continue to work. If you still want to register old WES agents on the new versions of Logmanager, although we strongly advise against it, it can be done by manually uploading a properties file - contact your partner for more information, or use help@logmanager.com.
Windows
Table shows all the main information about the connected stations. Name of the station (Name), version of the operating system (OS Version), version of the installed WES client (Version), station IP address (IP), events source (Events), whether a filter is applied (Filter), whether other software sends logs (Log files), user tags (Tags) and last activity between station and Logmanager (Last Check).
At the top of the table are the fields to search in all the columns in a table. If you, for example, want to search for a PC with the IP address 192.168.1.1, start typing this IP into the field and the table will gradually be reduced.
Every device with OS Windows can have an assigned user tag (Tags). Complete list of tags is always listed in the device overview, sorted alphabetically. Filtering by the selected tag is applied by clicking the plus icon. Filtered tag is shown above the device list. You can apply a filter for more tags, the AND term is used between the tags selected.
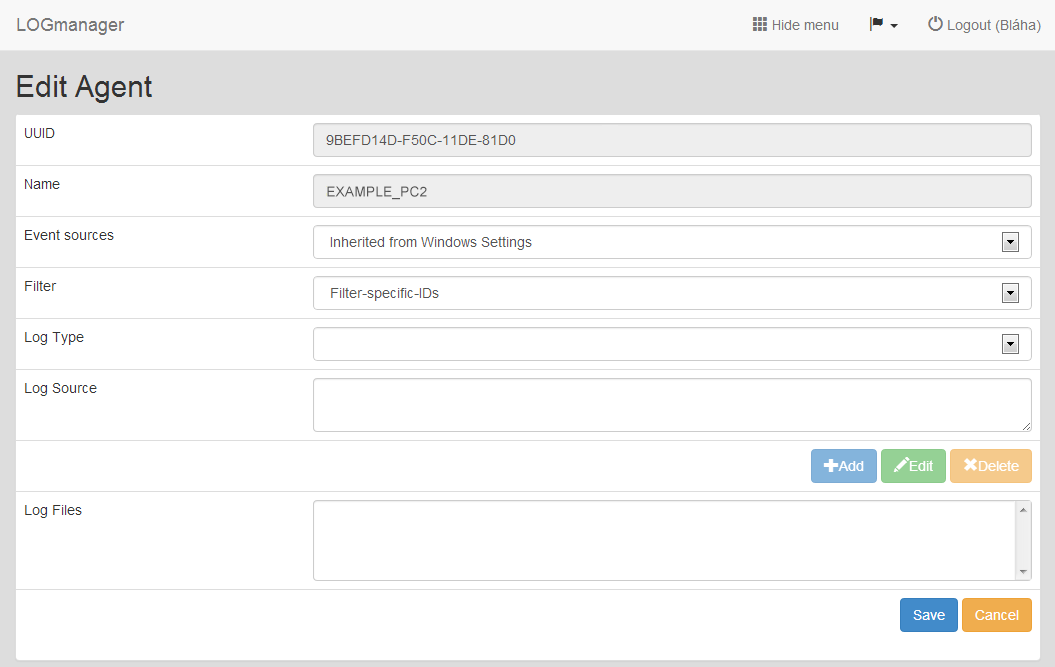
To edit the client station, click the blue pencil icon. A form will be shown with following information:
- UUID: unique identifier of the client station
- Name: name of the station
- Event sources: available options are:
- Inherited from Windows Settings: You can use the global settings for Windows - Windows settings.
- All event sources: record all sources of events generated by Windows.
- System event sources: record event sources only the category System.
- Filter: If it is required to filter the data, select the appropriate filter. The filter settings is described in the chapter Windows filters.
- Log Type: Choose from the available options, type the log file you want.
- Log Source: Fill in the path to a log file on the client, for example:
c:\windows\system32\LogFiles\Firewall\pfirewall.log.- To get logs from the whole folder, use the symbol *, for example:
c:\windows\system32\LogFiles\Firewall\*.log.
- To get logs from the whole folder, use the symbol *, for example:
- Adding settings for the log file and its type is done by clicking the button +Add. The settings are transferred to the field Log Files. It is possible to define an unlimited number of log files.
- Tags: Insert requested tag name and click the add button or select the tag from the existing tags list.
Editing the client station
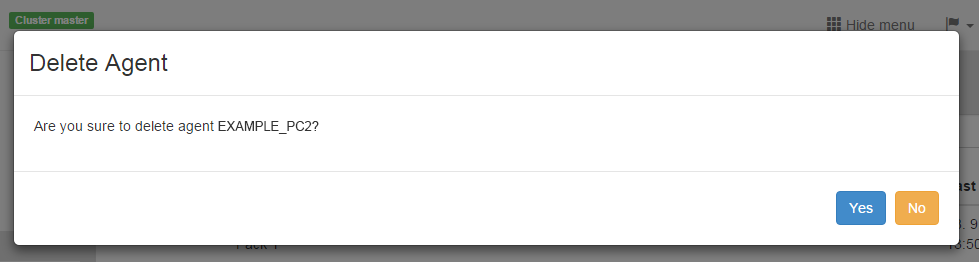
To delete the client station, click the blue cross. Popup window appears where you can confirm or cancel the deletion of the client station.