Microsoft Windows Event Sender (WES) (Deprecated)
This service is included as part of Windows core functionality, and is directly connected to the internal Windows logging system. When a new event is logged, it is processed in real-time by the service, reformatted, and sent to Logmanager server.
New versions of Logmanager 3.9.X cannot register newly installed WES agents. The development of the WES agent has been discontinued and replaced by the new Logmanager Beat Agent. The already installed/registered WES agents will continue to work. These are really just new installations of “old” WES agents, they are referred to as “legacy” or “deprecated”. We therefore recommend switching to the new Logmanager Orchestrator - Logmanager Orchestrator.
From version 3.11 there is an option to automatically migrate your deprecated WES agent to the current version of new Orchestrator. Go to What to look out for when migrating to the new Agent? to learn how.
- Windows Vista
- Windows 7
- Windows 8
- Windows 10
- Windows 2008 server
- Windows 2008 R2 server
- Windows 2012 server
- Windows 2012 R2 server
- Windows 2016 server
- Windows 2019 server
Windows XP and Windows server 2003 ARE NOT supported.
-
DNS SRV records set
-
Before installation, it is necessary to have Microsoft .NET minimum version 4.5 installed on workstation/server
Can be downloaded from Microsoft website or from:
http://go.microsoft.com/fwlink/?LinkId=255995
If the application is not installed using Group policy, it is necessary to run the installation with administrator rights.
To ensure the simplest configuration of end workstation servers, Logmanager uses EventSender. Detection of Logmanager server IP address using DNS.
IP address of Logmanager server is automatically detected by DNS SRV query in the following format:
_logmanager._tcp.<our-domain>
To add the SRV records it is necessary to open DNS server administration and add a new SRV record in to the actual domain in _tcp sub folder.
First SRV record must have the following path:
_logmanager._tcp.<our-domain>
First SRV record must include the following:
- service: _logmanager
- protocol: _tcp
- port number: 20514
- host offering this service: <domain name of Logmanager with “."(dot) at the end!>
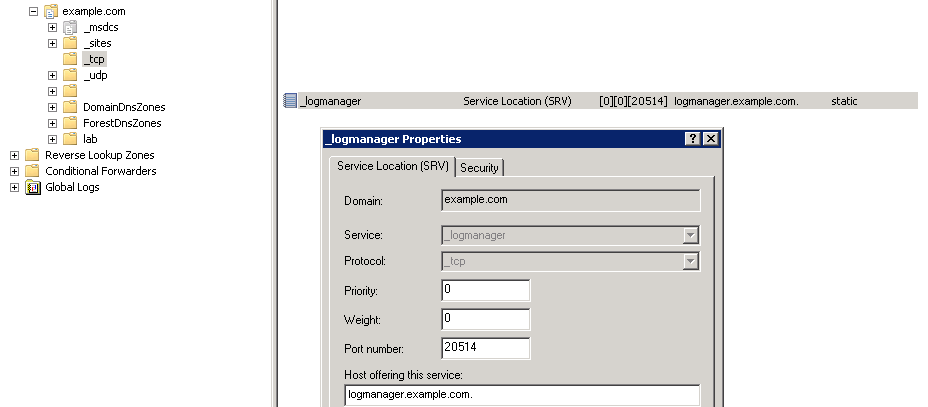
Example of correct SRV record
Example of correct SRV record
Second SRV record must have the following path:
_logmanager-ssl._tcp.<our-domain>
Second SRV record must include the following:
- service: _logmanager-ssl
- protocol: _tcp
- port number: 20515
- host offering this service: <domain name of Logmanager with “."(dot) at the end!>

Example of correct SSL SRV record
In order to resend logs and acquire updates, DNS SRV records are used to detect the Logmanager server IP address automatically.
Workstation / server sends DNS SRV query in the following format:
_logmanager._tcp.<name of own AD domain>
(Example: _logmanager._tcp.example.com)
From the information in the SRV record, the IP address (on which the parsed logs are sent) is automatically set.
If the station/server is not a part of Active Directory, DNS discovery will switch to fallback mode. To find the IP address of Logmanager server station tries to use the DNS suffix, which the station has set statically or from a DHCP server.
Computers which are part of AD, are searching always only the SRV record, which corresponds to FQDN name of own domain.
Run this in command prompt:
nslookup
set type=srv
_logmanager._tcp.<name of AD domain>
An example data return:
> set type=srv
> _logmanager._tcp.office.ad
Server:  Unknown
Address:  192.0.2.10

_logmanager._tcp.example.com      SRV service location:
            priority       = 0
            weight         = 0
            port           = 20514
            svr hostname   = logmanager.example.com
The SRV hostname is the IP address, to which the logs will be sent, and also the address against which a check will be conducted on newer versions of Windows Event Sender.
Part of the EventSender installation is a mechanism for automatic updates and configuration of the agent. On a client startup and then every hour from the start, agent connects via HTTPS protocol to the Logmanager server and downloads a XML file with information about the latest agent version and latest config version.
If there is a new agent version, agent downloads new binary files, checks them if they are signed by a trusted qualified certificate Logmanager a.s. and then runs the update script. Script stops the service, updates the agent files and then re-runs the service again.
Same mechanism is used in case of the newest configuration.
If there is already a Group Policy in use and a shared folder for automatic updates of MSI packages, Logmanager will only be added to the existing environment.
If the Group Policy and shared folders are not used, these will be created.
Install package is available in menu sources ‣ Windows settings. You can download latest version of WES agent by clicking on button Download Windows client installation package.

Download WES agent
All install files released by Logmanager a.s. are signed by a qualified certificate. After the download, please check if the MSI package is signed correctly.
Select properties of the downloaded MSI file and go to the tab digital signatures.
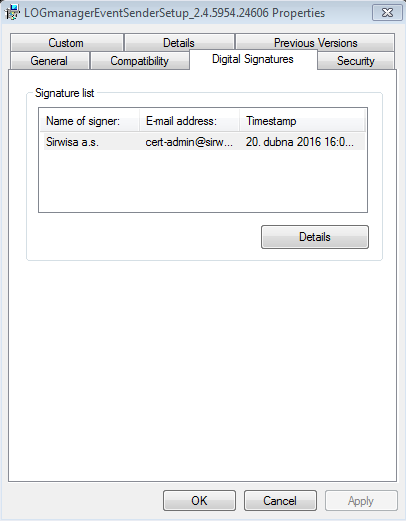
Digital signatures tab
For information about the signature click on the button details.
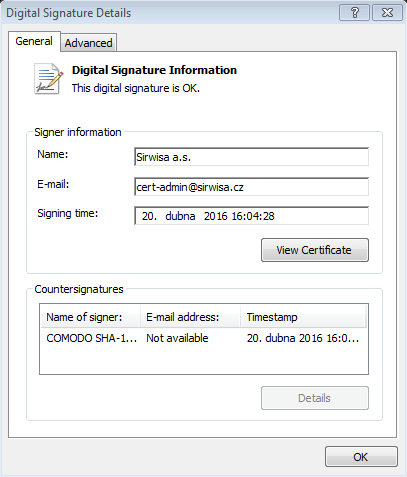
Digital signature details
You can view the signature certificate by clicking on the view certificate.

Certificate information
-
Create a folder on an arbitrary FileServer (e.g.
D:\Logmanager) and turn on sharing for this folder (e.g. under name LM$)- Rights for folder security and rules for sharing have to be set to read for authenticated users or for everyone.
- Copy the installation MSI Event Sender file to the folder.
-
Create a Group Policy Object on DC with the name Installation LogManager and link it to the OU, which contains PCs on which the Event Sender should be installed
- Right-click on the newly created GPO and select Edit.
- In GPO editing find the folder
Computer Configuration\Policies\Software Settings\Software Installation. - Right-click and select option “New / Package”, and insert the path to the MSI package in the UNC format (e.g.
%%\\servername\LM$\Logmanager_Event_Sender.msi%%).
The name of the file CANNOT contain spaces!!!- Option - To deploy Software, in the following dialog set to Assigned.
-
On the client station/server run command gpupdate / force, restart the PCs and check if the Logmanager EventSender is installed
If the installation has not been successful, check the System EventLog of the specific workstation / server.
If the installation ended with error 1274 or 1612, the workstation has a problem accessing the network folder, and it is necessary to repair/change the rights to the shared folder.
Furthermore, it is possible to adjust the “Default Domain Policy”, so there is enough time to process the installation GPO here you have to set:
- Computer Configuration/Administrative Templates/System/Logon/Always wait for network = Enabled
- Computer Configuration/Administrative Templates/System/Group Policy/Startup policy processing wait time = enabled + reasonable amount of time (e.g. 45sec)
If the installation ended with error 1001, then it is necessary to run installation with administrator permission.
You can right click on the installation icon and you can choose run as administrator option.