Aruba Networks WLAN
To successfully receive and process logs, you need to set up the log classification correctly. The easiest way to do this is to add the IP addresses of the device (or your chosen subnet) to the appropriate IP prefix list.
Some devices in Logmanager do not have their own IP Prefix list and you need to create one or use a classifier - Classification. However, an IP prefix list exists for this device, so follow the procedure below.
-
Log in to the web administration Logmanager.
Add the IP address of the Aruba device to the IP prefix list “HP-Aruba”.
Go to IP prefix lists in Tools:
- Locate the IP prefix list HP-Aruba.
- Edit with the blue pen icon.
- Add the IP addresses of your Aruba devices. (Alternatively, you can use your chosen subnet)
This is the standard for most Logmanager installations. If you use your own classifiers or are unsure about something, please contact your certified partner or help@logmanager.com. -
Log in to your Aruba Controller device using SSH and use the following commands to configure the format of syslog messages correctly:
ssh admin@aruba-controller -
Enable administration mode:
enable -
Now enter the configuration mode:
configure terminal -
Enable logging of all messages to Logmanager:
logging <Logmanager_IP_address> -
Save the configuration by keypress
Control-Zor the exit command. -
Save your Aruba controller configuration with the write memory command.
From now on, your Aruba device will be sending logs to Logmanager.
To successfully receive and process logs, you need to set up the log classification correctly. The easiest way to do this is to add the IP addresses of the device (or your chosen subnet) to the appropriate IP prefix list.
Some devices in Logmanager do not have their own IP Prefix list and you need to create one or use a classifier - Classification. However, an IP prefix list exists for this device, so follow the procedure below.
-
Log in to the web administration Logmanager.
Add the IP address of the Aruba device to the IP prefix list “HP-Aruba”.
Go to Parsers:
- Locate the IP prefix list HP-Aruba.
- Edit using the blue pen icon.
- Add the IP addresses of your Aruba devices. (Alternatively, you can use your chosen subnet)
This is the standard for most Logmanager installations. If you use your own classifiers or are unsure about something, please contact your certified partner or help@logmanager.com. -
Log in to web administration, you need a username with admin privileges.
Login to web administration
-
Go to
Configuration ‣ MANAGEMENT ‣ Logging. -
Enable logging of all messages to Logmanager. Click the new button and fill following fields:
- IP address: set the IP address of your Logmanager serevr
- Category: N/A
- Logging Facility: N/A
- Severity: N/A
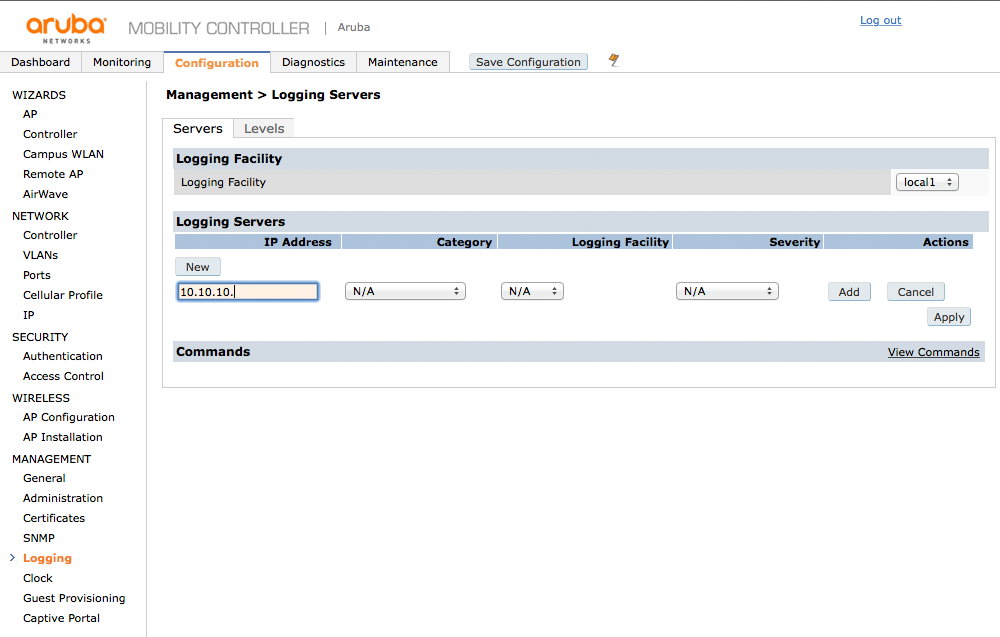
Enable logging of all messages to Logmanager
-
Now click the Add button and the Apply button to save inserted data.
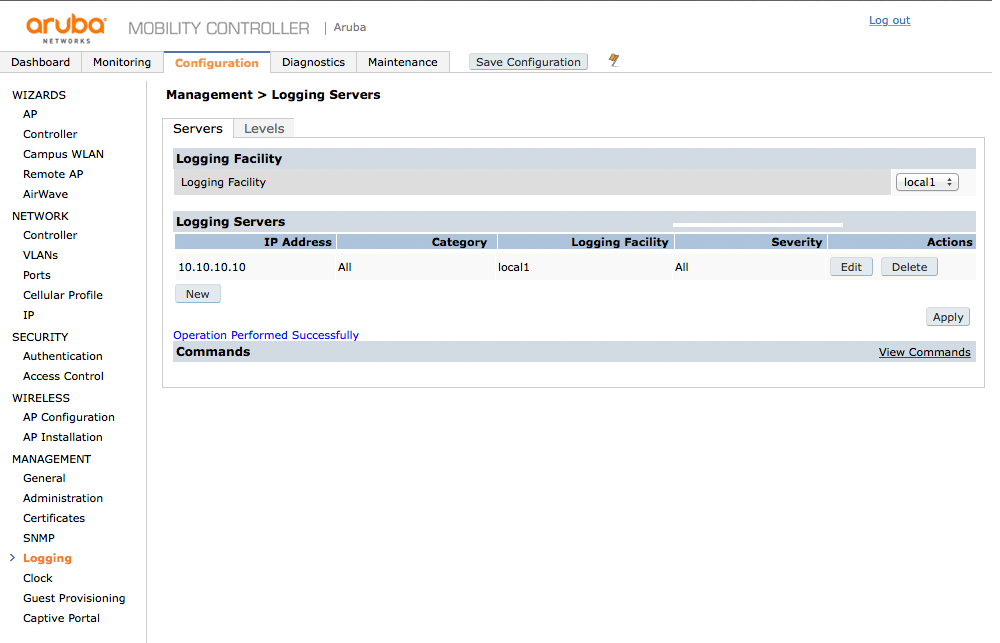
Table of Logging Servers
-
Save the Aruba Controller configuration by click the Save Configuration button.
From now on, your Aruba device will be sending logs to Logmanager.
-
Add your Aruba Instant AP to Logmanager Devices: Devices.
On the Add new Device page, fill the following form fields:
- Name: ArubaInstantAP
- IP: <ArubaInstantAP_IP_address>
- Type: ArubaOS
-
Log in to your Aruba Instant AP device using SSH and use the following commands to configure the format of syslog messages correctly:
ssh admin@instantap -
Now enter the configuration mode:
configure terminal -
Enable logging of all messages to Logmanager:
syslog-server <Logmanager_IP_address> -
To specify the logging level, use syslog-level command with severity option (in this case, we use severity info):
syslog-level info -
Commit the configuration changes:
commit apply -
Save the configuration to memory and configuration is now in effect.
write memory
From now on, your Aruba device will be sending logs to Logmanager.
This procedure demonstrates the GUI configuration for all available syslog messages.
-
Add your Aruba Instant AP to Logmanager Devices: Devices.
On Add new Device page fill the following form fields:
- Name: ArubaInstantAP
- IP: <ArubaInstantAP_IP_address>
- Type: ArubaOS
-
Login to web administration, you need a username with admin privilege.
Login to web administration
-
Click the System button on the top of page.

Aruba Instant AP home screen
-
Click the Show advanced options button on the bottom of page.
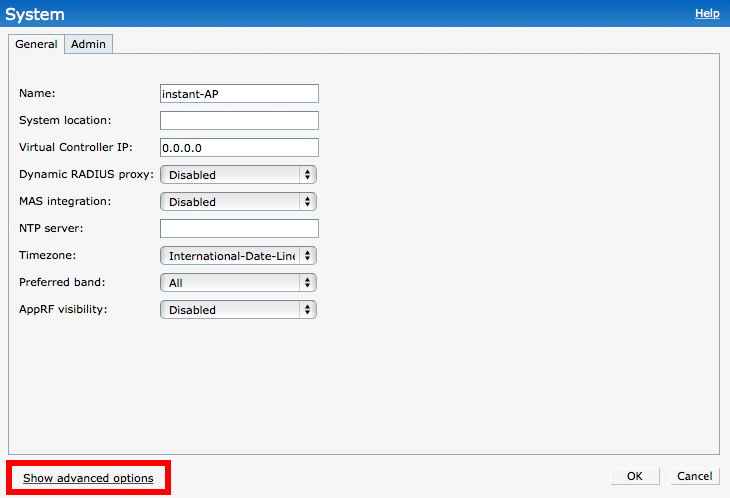
Click Show advanced options
Now click the monitoring tab and fill field:
- syslog server: set to the IP address of your Logmanager server,
- and choose Syslog Facility Levels for all categories (level info is recommended)

Logging to syslog configuration
-
Click the OK button to save your configuration.
From now on, your Aruba device will be sending logs to Logmanager.
- In the Managed Network node hierarchy, navigate to the Configuration > System > Logging > Syslog Servers page.
- To add a logging server, click + in the Syslog Servers section.
- Add the address of your Logmanager to the list of log servers. Click Apply.
- To select the types of messages you want to log, select Logging Levels .
- Select the category or subcategory to be logged.
- To select the severity level for the category or subcategory, select the level from the Logging Level drop-down list.
- Select the logging format CEF or BSD-standard from the Format drop-down list.
The ArcSight CEF is a log management standard that uses a standardized logging format so that data can easily be collected and aggregated for analysis by an enterprise management system.
- Click Submit.
- Click Pending Changes.
- In the Pending Changes window, select the check box and click Deploy changes.