Synology
Firstly it is necessary to install Synology DSM plugin “Log Center” package.
Installation:
- In Synology DSM (DiskStation Manager) go to Package Center and install the Log Center package.
After the installation is done, set the package as follows.
For logging to Logmanager follow the instructions below to configure your Synology NAS as a syslog client and transmit the local system logs of your Synology NAS to Logmanager for centralized monitoring and management.
Sending logs to Logmanager:
- Go to Log Center > Log Sending.
- Tick the box Send logs to a syslog server.
- Enter the Logmanager hostname or IP address.
- In Port specify a port number as 514 for receiving syslog messages.
- Select TCP from Transfer protocol. This should match the protocol used by the Logmanager.
- Select IETF (RFC 5424) from Log format to send logs using the selected format.
- By default, the port is 514. Proper port forwarding rules must be set if you want to reassign a different port number to syslog server.
- UDP (User Datagram Protocol) is a simpler message-based connections protocol that is faster but lacks security and error correction. TCP (Transmission Control Protocol) offers guaranteed delivery, in which it uses a flow control to determine whether all the packets have been successfully sent before new ones are processed.
- Secure connection (SSL) is only available when using TCP.
- If you choose TCP and want to secure the syslog connection with SSL, you can tick the Enable secure connection (SSL) option. Then click Import certificate and select the certificate for transferring logs securely to the syslog server.
- Click Send test log to confirm the Logmanager can receive the log successfully. If the Logmanager does not receive the test log, please check your settings are correct.
- Click Apply to save settings.
On the Filter tab, you can specify which types of logs are sent to the syslog server, according to category (e.g. system, connection, backup) or severity (e.g. warning, error, information).
To successfully receive and process logs, you need to set up the log classification correctly. The easiest way to do this is to add the IP addresses of the device (or, alternatively, the subnet of your choice) to the appropriate IP prefix list.
Some devices in Logmanager do not have their own IP Prefix list and you need to create one or use a classifier - Classification. For this device the IP prefix list does not exist, so follow the procedure below.
-
Log in to the web administration Logmanager.
-
Go to IP prefix lists in Tools:
- Click the icon with the plus icon and create a new IP prefix list
- Select name as the Synology
- Add the IP addresses of your Synology devices (Alternatively, you can use the subnet of your choice).
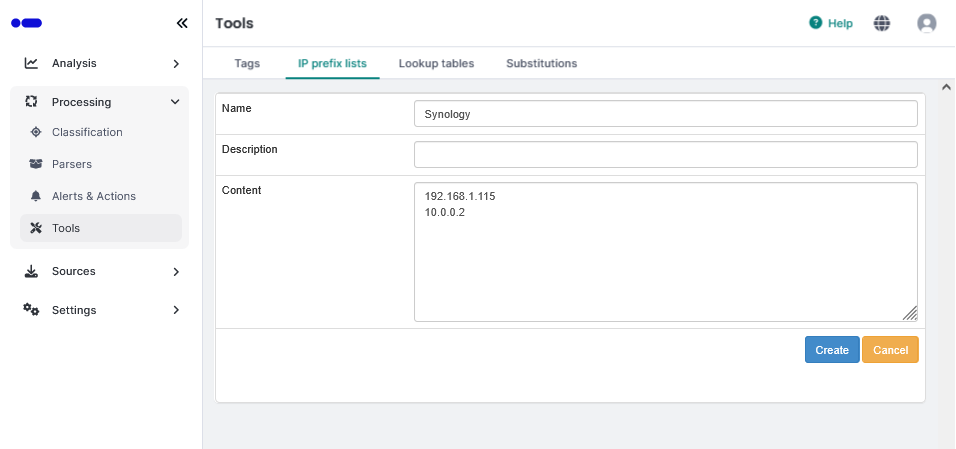
New IP prefix list
-
Go to Processing/Classification/Classifiers
- In case you are using your own unique classifier, modify it and add the following condition:

Adding a condition to the classifier
-
In case you don’t use your own unique classifier, create one:
- Go to Processing/Classification/Classifiers
- Click the plus icon on the right and create a new Classifier
- Name it arbitrarily, for example “Synology” and insert the following condition:
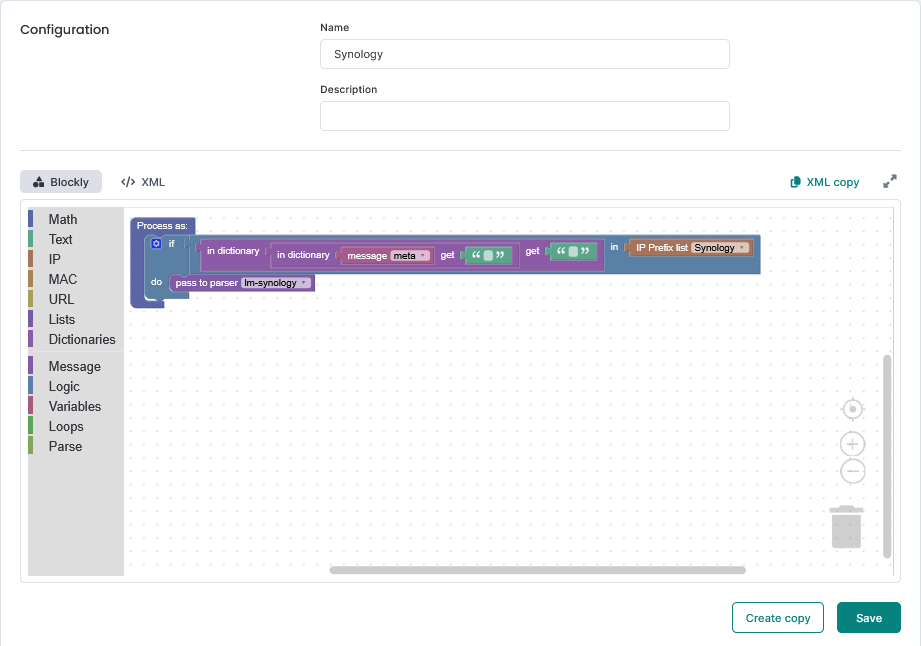
Adding a condition to the classifier
Classifiers are sorted alphabetically, make sure the classifier you create is not the last classifier.This is standard for most Logmanager installations. If you are unsure about anything, please contact your certified partner or help@logmanager.com