Reports
Menu Reports is used to define the conditions under which it generates a report with the required data.
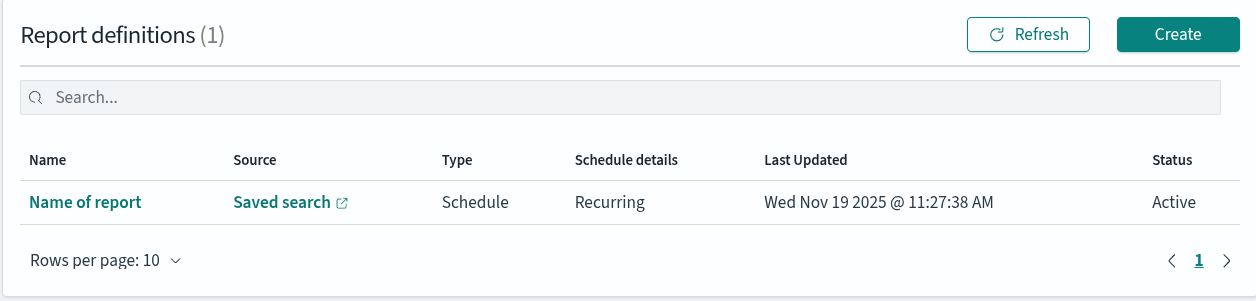
The generated reports are automatically saved and can be found in Analysis -> Reports section, on top of Reports page, while the reports definition can be seen on bottom. This allows you to set up the generation of any reports that are required. The whole idea is based on the fact you can select a source of report, such as Dashboard, Visualisation or Saved search from Discover. Then you can use this as a template for creating a new report. The generated report can be in PDF or PNG format and contains the data as is presented in Dashboard. If the generated report does not satisfy your needs, you must open the desired source (dashboard, visualisation…), make the required changes and save it with the same name. Then an updated source will be used to generate next report.
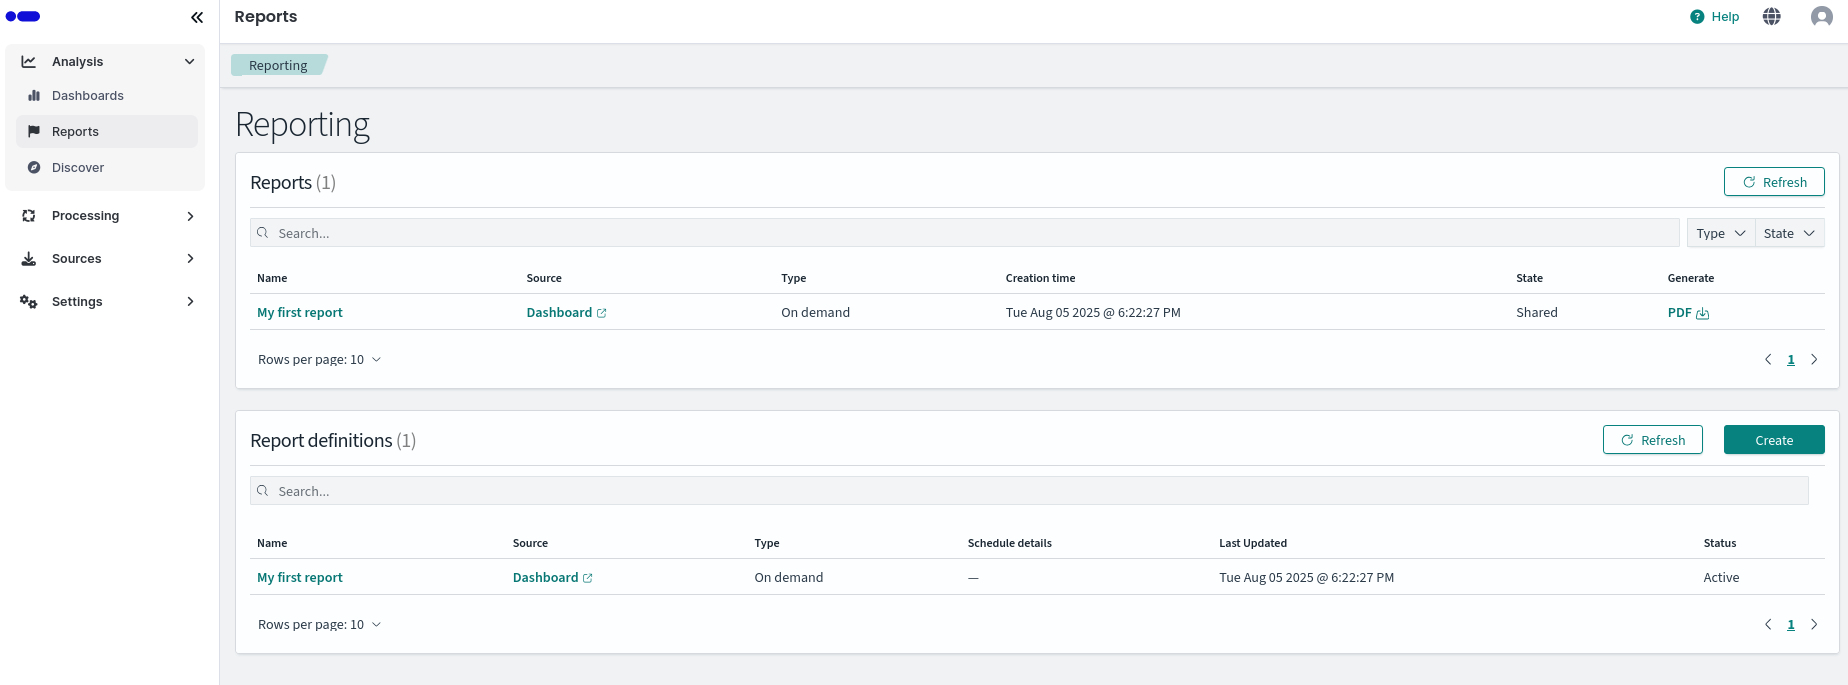
Reports page
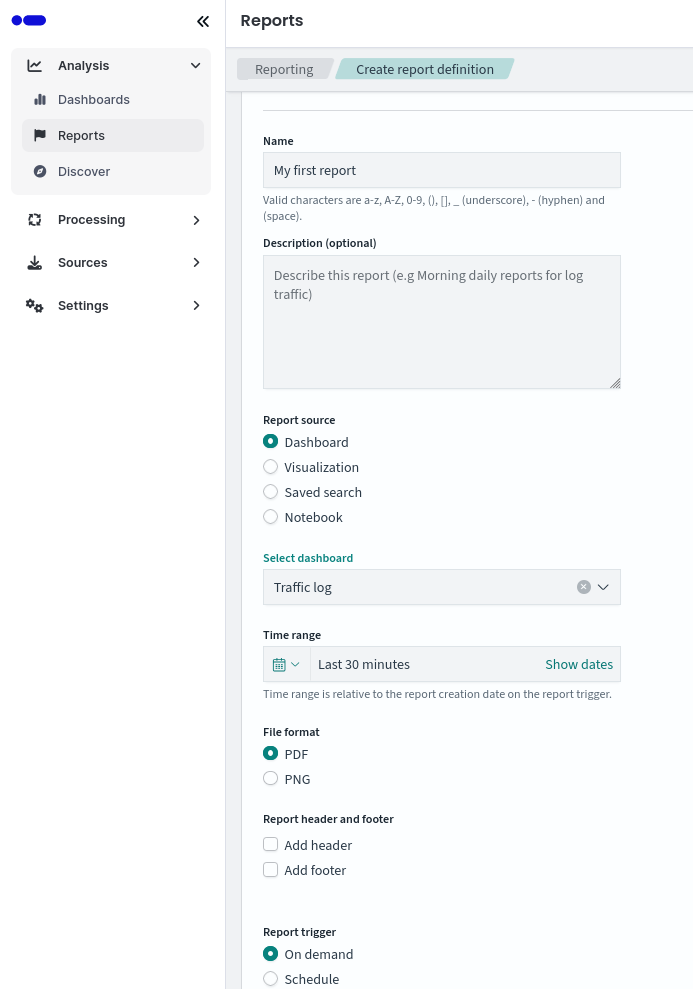
Go to Analysis -> Reports -> Create (on the bottom left) page to observe and create report definitions. This form contains all the important information, as explained below:
- Name: Name of the report.
- Description: The description of what the report contains.
- Report source: Pick a source for report “template”.
- Select source: A drop down with list of sources based on previous selection.
- Time range: How long period the report contains.
- File format: Select either PDF or PNG.
- Report header and footer: You may optionally add a header or footer to report. Markdown text style supported.
- Report trigger: The time when the report is or will be generated.
You can create, edit or delete the reports. The entered data are validated, if any item is filled in wrong, the form can't be created, and the invalid entry will have a red box.
Create report page
In order to edit existing report definition you should click on report name in Reports definition name you like to update.To edit this report click on to top right button Edit. There is also a Delete button which will delete this definition if you don’t need it anymore and Generate report button which will generate report regardless of the report trigger time.
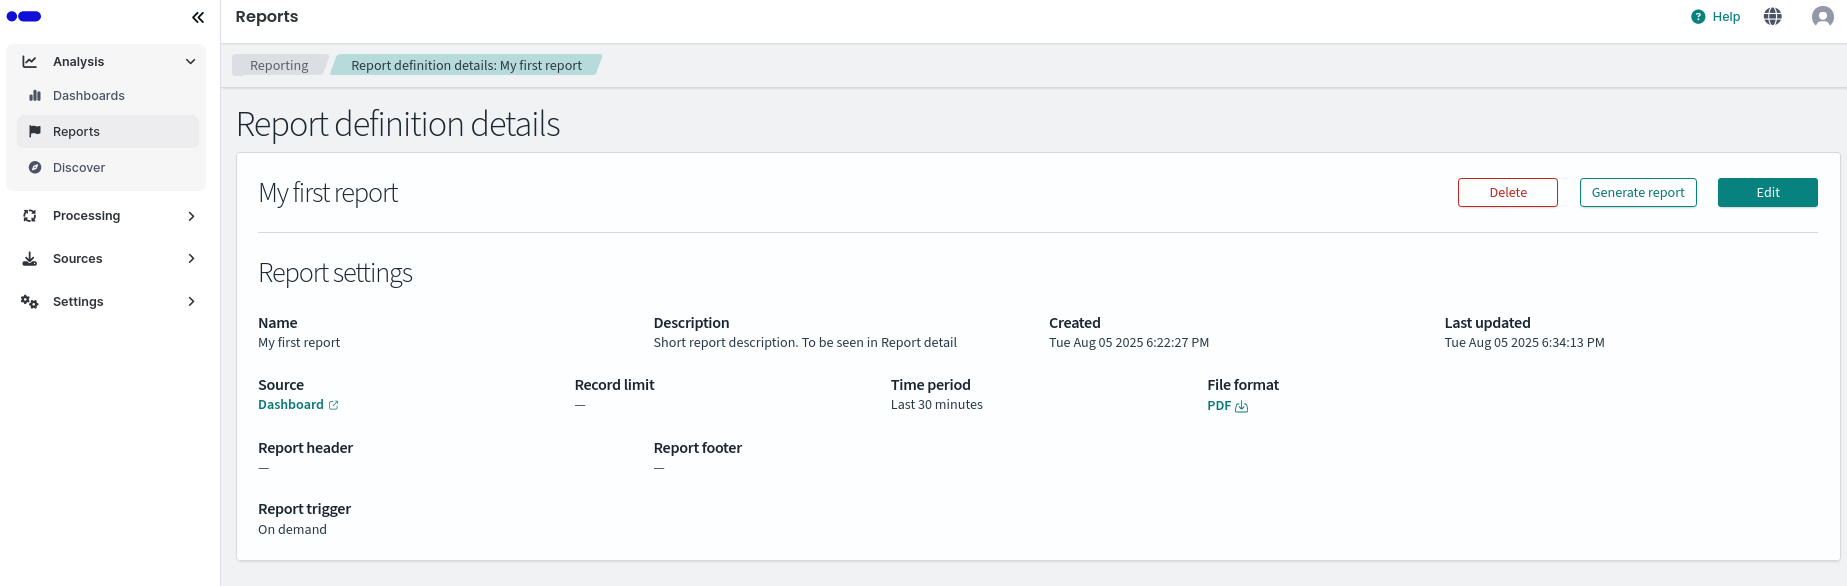
Editing an existing report
Logmanager allows exporting data in CSV and XLSX formats from two sections of the web interface:
- Discover section
- Reporting section
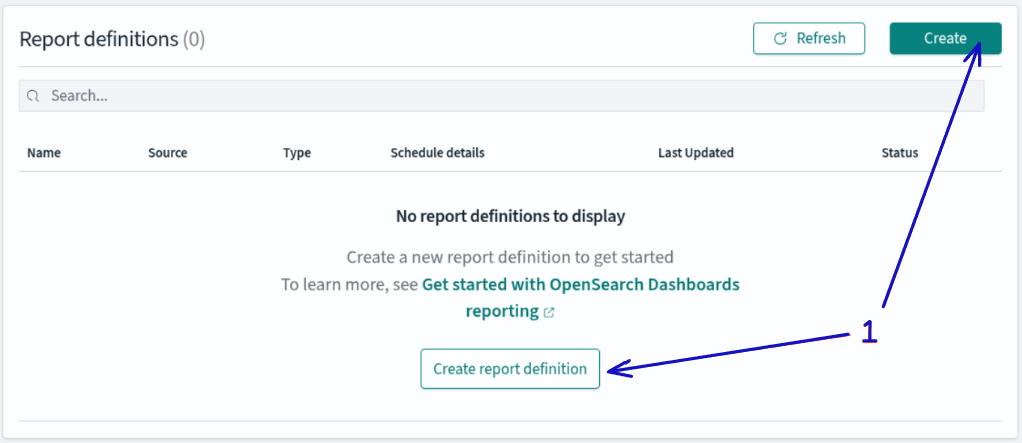
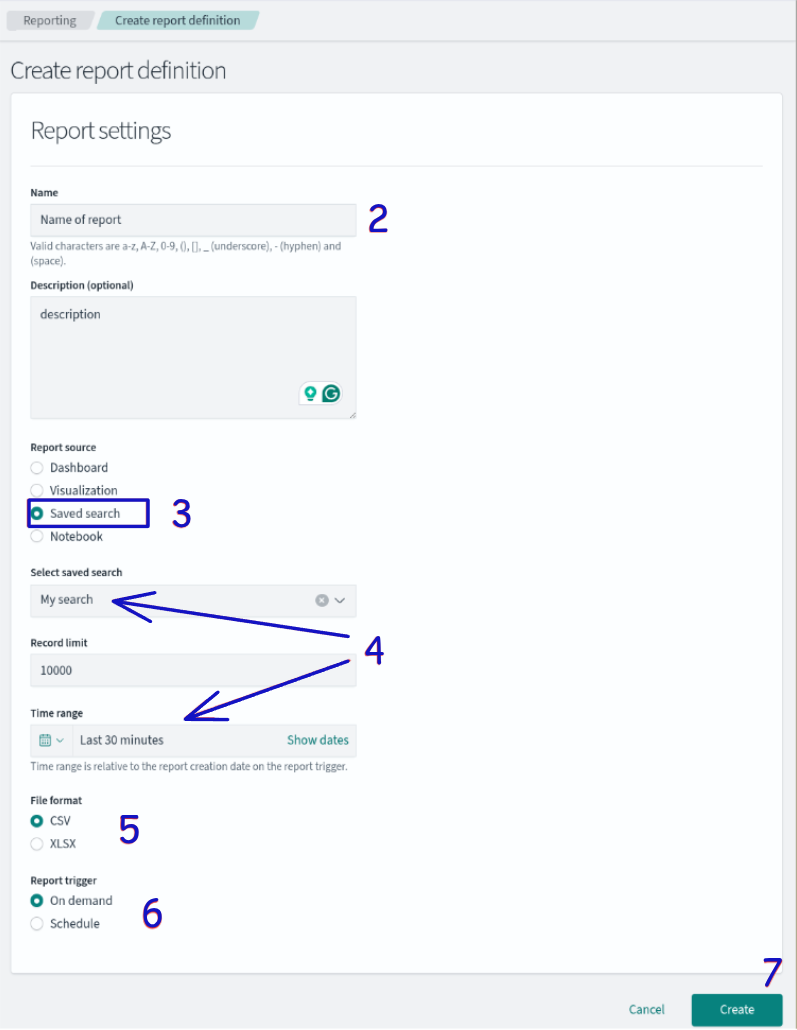
For export in Reporting section follow these steps:
-
Click Create.
-
In Report settings, enter a report name and optional description.
-
Select Report source, i.e., the page from which the report will be generated. Options:
- Dashboard
- Visualize
- Discover (saved search)
- Notebooks
-
Select the saved search and set the time range for the report.
-
Choose the desired file format for the report.
-
In Report trigger, set:
- On demand
- Schedule
For scheduled reports, choose:
- Recurring
- Cron based
Reports can be received daily or at other intervals; Cron expressions provide greater flexibility. Details are provided in Cron expression reference.
-
Click Create.
Exporting data from the Reporting page
Exporting data from the Reporting page
The exported data are available for download in the Reporting section.
Where to find exported data
When importing CSV into Microsoft Excel, choose UTF-8 encoding in the import wizard.

Exported data in CSV and XLSX format